To turn a PVC run through a right angle in Crafti, place a 90-degree elbow between two compatible pipes. Start from a pipe's connection point so you can choose a fitting for that connection, then add the second pipe from the elbow's other opening.
This guide describes assembling the digital design in Crafti. For a real project, follow the actual pipe and fitting manufacturers' installation instructions and choose components suitable for the intended use.
Choose compatible parts
For a simple example, use two PVC pipe sections of the same nominal size and a matching 90-degree elbow. Check both the size and the connection style: a socket/slip connection and a threaded connection are different interfaces. A matching number in a part's name is not enough on its own.
Build the corner
1. Start a design or open one you can edit.
2. Choose + Add a Part on an empty design, or the + Add control in the editor, and find a PVC pipe. Add it to the scene.
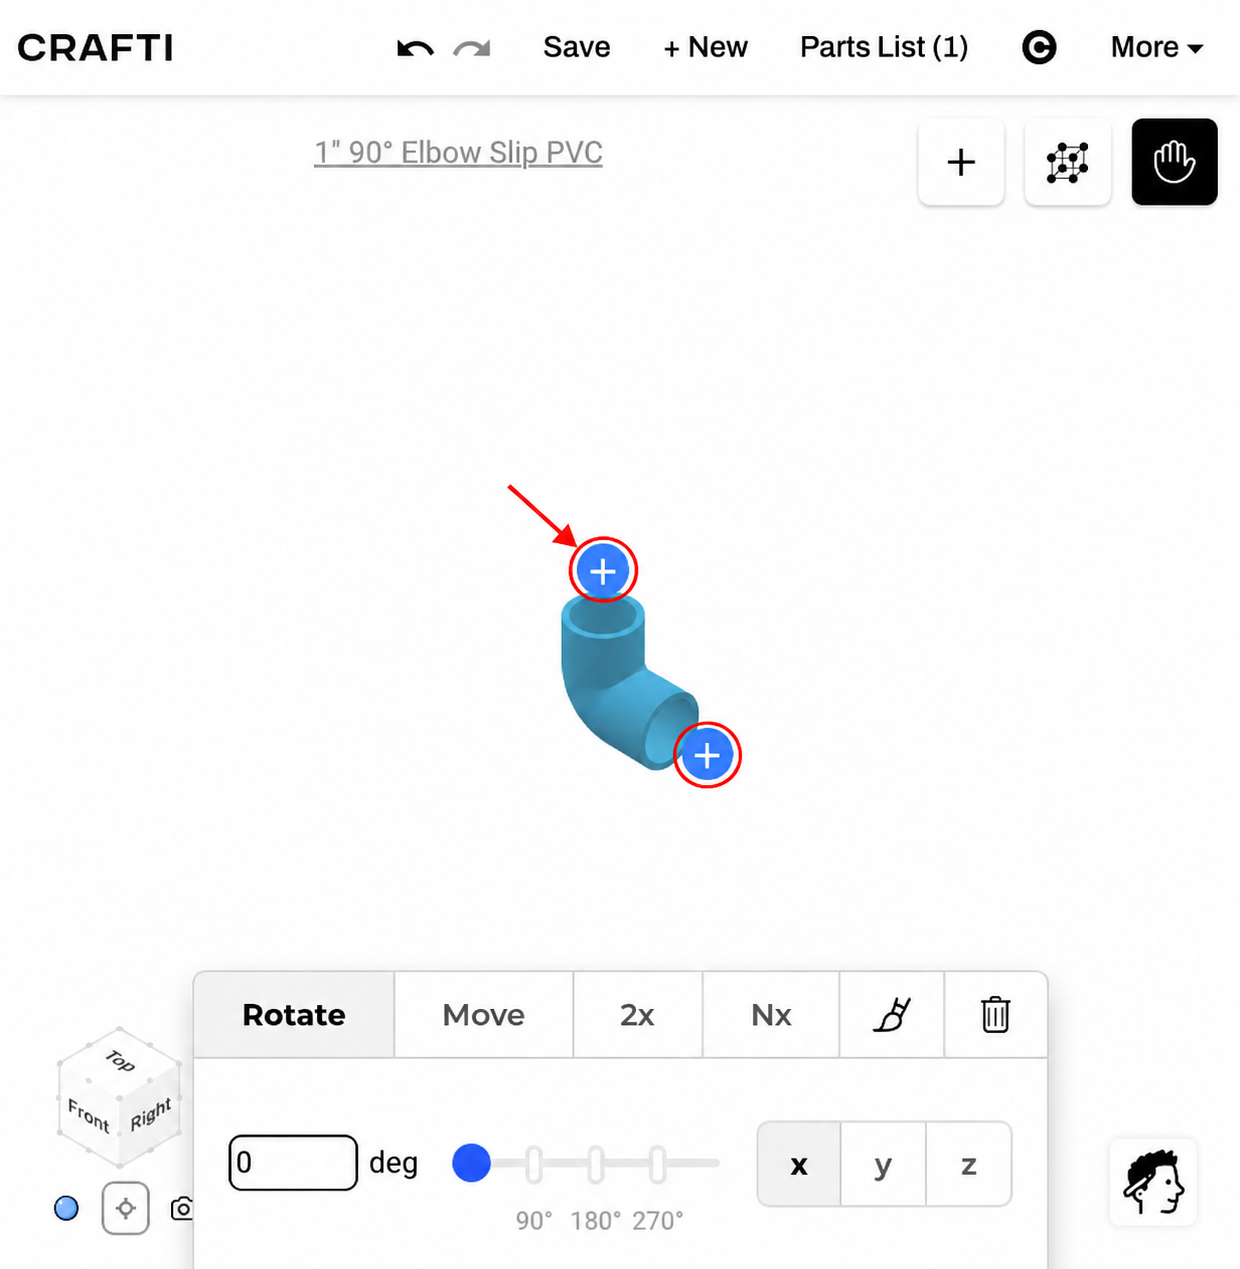
3. Select the pipe so its connection markers appear.
4. Click the + at the end where you want the corner. This opens part choices for that connection.
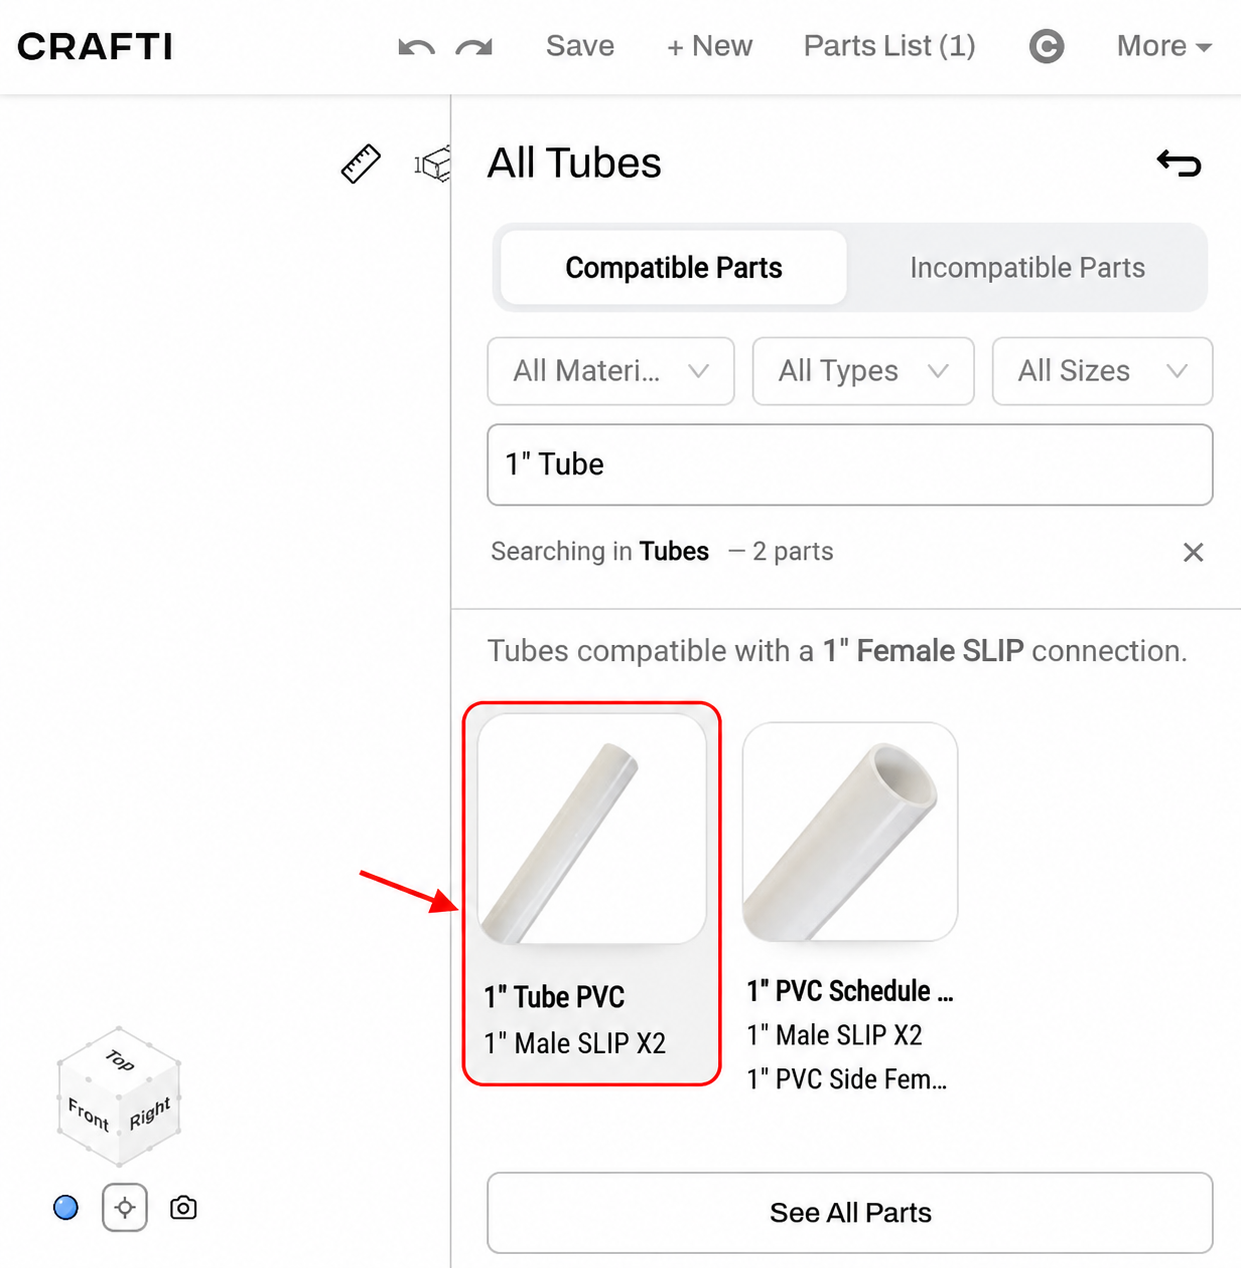
5. Find a compatible 90-degree PVC elbow of the required size. Check the connection information rather than choosing a 45-degree elbow or a fitting with the wrong end style.
6. Add the elbow through that connection. Inspect the corner's direction. If it points the wrong way, use the available rotation controls to orient it and check the joint again.
7. Select the elbow, click the + on its remaining opening, and choose a compatible PVC pipe for the second section.
8. Inspect the result from more than one camera angle, check the dimensions and save the design.
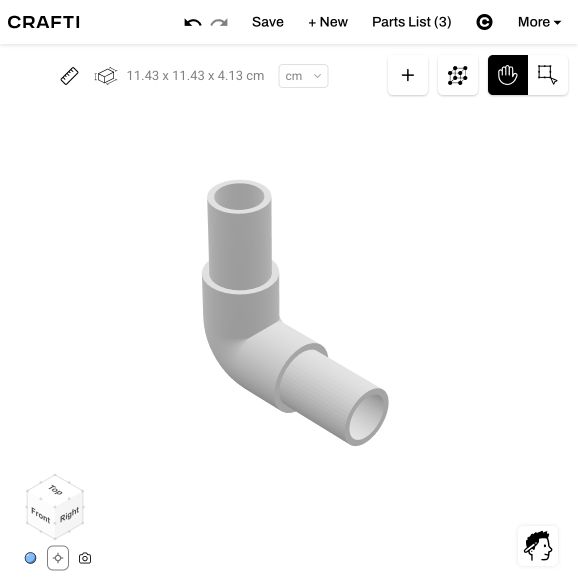
You can use the connection + workflow for each new component instead of placing all three parts independently and trying to line them up by eye.
If the pipes do not join
- The elbow does not appear: check the search and filters. Confirm that the pipe end and fitting use compatible types and sizes. Browsing all parts can show items that do not fit the selected connection.
- The elbow faces the wrong way: inspect which end was selected and use the fitting's supported rotation controls. Moving a part into a visually convincing position does not by itself establish a connection.
- The pipes touch but are not joined: use the actual connection markers or supported snapping. Inspect the connection rather than relying on a single screenshot.
- The pipe has no connection points: an uploaded or generated model may have no recognised connectors. A mesh that looks like a pipe is not automatically a connectable catalog pipe.
- The design will not edit: make sure you have an editable design or permission to create your own copy, and wait for any active operation to finish.
Check lengths and real-world fit
An elbow adds its own geometry to the corner, so check the finished design's dimensions rather than assuming the two pipe lengths alone describe the outside size. Then open Parts List to review the two pipes and the fitting.
A digital connection is a design aid, not a pressure, structural or installation certification. Confirm the actual product dimensions, materials and intended service before purchasing or building. For related material guidance, see Can I Connect PVC Pipe with Metal Threads? (https://crafti.com/can-i-connect-pvc-with-metal-threads) and How to Connect PVC Pipe Without Glue (https://crafti.com/how-to-connect-pvc-pipe-without-glue).
Ready to try it?
Crafti runs in your browser on your phone or computer.